
The right equipment.
A clearer connection.
Explore kits, mounts, routers, cables and accessories. Open an item for its compatibility notes and related guidance.
Always confirm compatibility with the official instructions for your exact hardware.
 Kits
KitsStandard V5
Standard-family terminal and router shown in the supplied V5 reference.
Details & compatibility+
Identify the pictured kit
Use the terminal label and your account equipment record when selecting accessories. The V5 image shows this listing’s terminal and router; appearance alone does not establish cable, mount or power-supply interchangeability with Standard 4 or 4X.
Before buying parts
Ask for the exact model, cable part and mount compatibility statement. Do not infer power-supply interchangeability from similar terminal dimensions. Use the separate Standard 4X entry when the label or official account listing confirms that model.
What to keep
Keep the order contents and equipment labels together. A generation nickname is not sufficient evidence for a replacement cable, power adapter or mount.
Related guides
- Starlink Dish Generations: Circular, Actuated, and Gen 3 ↗
- Starlink Mini, Standard, and Performance Dishes Compared ↗
Reference sources
 Kits
KitsStandard 4
A flat, manually positioned Standard terminal; often called the Gen 3 kit.
Details & compatibility+
Identify the parts
Read the terminal and router labels separately. “Gen 3” may refer to Router 3 rather than a complete compatibility description. Standard 4 and Standard 4X should remain distinct when ordering power equipment.
What to check in a used kit
Inventory the terminal, its kickstand or compatible mount, correct supply, router and terminal cable. Confirm that connectors are intact and the account transfer is complete before assuming the kit can be activated.
Mounts and cables
Use accessories explicitly listing Standard 4. Measure the complete route and the support or overhang relevant to the mount. A visually similar Performance cable is not a verified substitute.
Related guides
- Starlink Dish Generations: Circular, Actuated, and Gen 3 ↗
- Starlink Cable Length, Conduit, and Weather Protection ↗
- Buying a Used Starlink Kit: What to Check Before You Pay ↗
Reference sources
 Kits
KitsMini
A compact terminal with integrated Wi-Fi for a small, portable setup.
Details & compatibility+
Identify and inventory
Mini has Wi-Fi within the terminal. Check for its kickstand, pipe/flat-mount parts, DC cable, supply and port plug in the purchased bundle. It is different from Router Mini, which is only networking equipment.
Power planning
Typical average use: 25–40 W. Approved USB-C operation requires the Starlink cable accessory and 100 W USB-PD at 20 V/5 A. A phone charger is not equivalent.
Weather and networking
The documented environmental seal requires the proper plugs/cables. Ordinary RJ45 cabling does not preserve the Mini’s IP67 rating. Position the terminal for clear sky and test whether integrated Wi-Fi reaches the devices you need.
Related guides
- Starlink Mini, Standard, and Performance Dishes Compared ↗
- Using Starlink With an RV Battery, Inverter, or Generator ↗
- Starlink Roam Plans for Mini and Standard Travel ↗
Reference sources
 Kits
KitsPerformance Gen 3
The current Performance terminal and Advanced Power Supply arrangement.
Details & compatibility+
Inventory
The current kit lists a 25 m terminal cable, Advanced Power Supply, AC/DC leads and Ethernet handoff cable. A Wi-Fi router is not listed in that packing list; plan the network separately.
Compatibility
Use the current Performance terminal cable and mounting instructions. Do not treat older Flat High Performance or actuated Performance accessories as interchangeable.
Installation planning
Plan exposure, structural attachment, cable service access and the network handoff together. The terminal supports manual orientation. A published terminal durability rating does not establish the rating of the complete roof or pole assembly.
Verify the result
Test the intended business or travel applications and power recovery. Premium hardware does not remove nearby obstructions or guarantee uninterrupted service.
Related guides
- Starlink Mini, Standard, and Performance Dishes Compared ↗
- Starlink as Backup Internet for a Business ↗
- Marine Starlink Mounting and Weatherproofing ↗
Reference sources
 Kits
KitsPerformance Gen 2 / Flat High Performance
Identify the flat Performance terminal and its matching older power ecosystem.
Details & compatibility+
Identification
Confirm the exact model from its label and account listing. The term “High Performance” is also used for older actuated equipment, so a name in a sales listing is insufficient.
Inventory and replacements
Match terminal, supply, terminal cable and Ethernet handoff to the same model. Ask for connector photographs and the original part listing when sourcing replacements. Do not connect the current Performance supply by assumption.
Mount and use
Identify the matching flat/wedge mounting assembly and its installation instructions. Check intended stationary or moving use separately against the service plan. An installed flat mount is not proof of in-motion eligibility.
Related guides
- Starlink Dish Generations: Circular, Actuated, and Gen 3 ↗
- Can Starlink Be Used While an RV or Boat Is Moving? ↗
- Marine Starlink Mounting and Weatherproofing ↗
Reference sources
 Kits
KitsEnterprise
A business kit configuration whose terminal and network handoff must be identified.
Details & compatibility+
Identify the bundle
Read the actual order contents and equipment labels. “Enterprise” describes a configuration; do not assume it means the current Performance terminal or includes the same router as a home bundle.
Network planning
Identify where Ethernet leaves the Starlink power equipment and which router will manage your LAN. Include switches, access points, addressing and backup power in the site inventory.
Accessories
Some Standard mounts explicitly list Enterprise compatibility. That does not make every Standard power supply or cable compatible. Confirm each relevant part and measure the complete route before ordering.
Handover
Keep terminal and supply models, cable parts, network diagram and support responsibility with the installation record. Test essential applications and planned power recovery.
Related guides
- Starlink Mini, Standard, and Performance Dishes Compared ↗
- Starlink as Backup Internet for a Business ↗
- Automatic Internet Failover With Starlink ↗
Reference sources
 Kits
KitsStandard Actuated
The motorized rectangular Standard family with its own cable and router arrangement.
Details & compatibility+
Identify
Look for a rectangular terminal on a motorized mast and confirm Standard Actuated in the equipment record. A larger actuated Performance terminal is a separate product.
Networking and inventory
The typical Gen 2 router arrangement needs the matching Starlink Ethernet Adapter to provide a wired handoff. Inventory the complete terminal, router, cable and power path when buying used equipment.
Handling and reuse
Do not force or restrain the motorized mechanism. Follow the terminal’s stow and handling instructions when moving it. Existing compatible actuated mounts may be reusable with the specifically listed Standard-to-Actuated adapter; inspect the original support first.
Related guides
- Can an Existing Satellite-Dish Mount Be Reused for Starlink? ↗
- Starlink Router Bypass Mode: Using Your Own Router ↗
- Starlink Dish Generations: Circular, Actuated, and Gen 3 ↗
Reference sources
 Kits
KitsCircular Standard
The original round terminal; retain its matched legacy power and cable system.
Details & compatibility+
Identification
A circular dish distinguishes this family from the rectangular actuated and Performance terminals. Confirm its labels and original power arrangement before sourcing parts.
Compatibility
Do not substitute newer Standard terminal cables or assume its router can join current native Starlink mesh. Existing local networking can be planned from the supported Ethernet handoff.
Reuse checklist
Inspect the cable, ports, supply, mast and attachment. Confirm that used hardware has been released for activation. Keep working equipment when it meets your needs; replace a confirmed faulty part with a verified match rather than upgrading solely because of age.
Related guides
- Starlink Dish Generations: Circular, Actuated, and Gen 3 ↗
- Buying a Used Starlink Kit: What to Check Before You Pay ↗
- When Starlink Equipment Should Be Replaced Instead of Repaired ↗
Reference sources
 Kits
KitsPerformance Gen 1 Actuated
An older Performance family that needs label-based identification.
Details & compatibility+
Identification
The supplied reference shows the rectangular Performance terminal on its actuated mast and tripod. Distinguish it from Circular Standard and newer flat Performance hardware, and use its model label when selecting replacement parts.
Parts inventory
Record the terminal and power-supply model, cable connectors and mount connection. Obtain the original matching instructions before buying a replacement; “High Performance cable” alone is too broad.
Handling and decision
Follow the exact terminal’s stow procedure and do not force any actuated mechanism. Check damage, availability of compatible parts and the actual operating requirement before deciding whether to retain or replace the system.
Related guides
- Starlink Dish Generations: Circular, Actuated, and Gen 3 ↗
- When Starlink Equipment Should Be Replaced Instead of Repaired ↗
- Buying a Used Starlink Kit: What to Check Before You Pay ↗
Reference sources
 Mounts
Kickstand
Model-specific support for a compatible terminal on a stable surface.
Details & compatibility+
Use
Useful for initial testing and portable placement where the surface is stable. The kickstand is not a generic anchored permanent mount.
Compatibility and clearance
Mini and Standard have different attachment parts. Confirm the correct stand, its locking engagement and room for the terminal to face the app-directed direction.
Before leaving it outside
Check movement, wind exposure, traffic and the cable route. If the equipment needs a fixed attachment, select a compatible mounting system. A terminal’s weather rating does not keep an unsecured stand from moving.
Related guides
Reference sources
 Mounts
Standard Pivot Mount
An adjustable mount for a compatible terminal on a suitable shingled roof.
Details & compatibility+
Fit
The current Standard mount lists Standard 4, 4X and Enterprise. Older actuated pivot mounts are distinct products.
Before installation
Confirm the roof system, sound fastening structure and the exact sealing method. A swivel angle does not solve an unsupported roof or blocked sky.
Scope and handover
Check the supplied fasteners and sealing materials against the manual and roof requirements. Arrange safe service access and cable support. Keep photos of the completed fastening and entry, and inspect after roof work.
Related guides
- Starlink Roof, Wall, Fascia, and Ground-Pole Mounts Compared ↗
- Replacing a Roof When Starlink Is Already Installed ↗
Reference sources
 Mounts
Standard Wall / Fascia Mount
A mount for a suitable wall or fascia with enough sky clearance.
Details & compatibility+
Fit and clearance
Current listed families: Standard 4, 4X and Enterprise. Maximum documented overhang: 4 inches. Measure your eave before ordering.
Structure
A fascia board, thin siding or brick veneer is not automatically adequate structural backing. Confirm where loads will be carried and how the wall assembly will be sealed.
Cable and maintenance
Approve the visible route and entry location before fastening. Keep a serviceable connector path and verify the dish clears the eave in the required alignment. Use another compatible position when reach is insufficient.
Related guides
- Starlink Roof, Wall, Fascia, and Ground-Pole Mounts Compared ↗
- Under-Eave Starlink Mounting: A Clean Alternative to Roof Mounting ↗
- Starlink Installation on Brick, Stone, Vinyl, and Wood Siding ↗
Reference sources
 Mounts
Standard Pipe Adapter
Connects a compatible terminal to a suitable metal pipe; it is not a complete pole.
Details & compatibility+
Fit
Standard 4/4X/Enterprise; metal pipe outside diameter 31–63.5 mm. Pipe is not included. Do not use PVC as a substitute.
Before reuse
Measure outside diameter, inspect corrosion and movement, and check the original attachment. An adapter that fits does not establish the strength of an old mast.
Installation
Use the supplied locking hardware as instructed. Plan sky clearance and the cable bend at the top without making the connector carry the cable’s weight. For a new ground pole, design the foundation and route separately.
Related guides
- Can an Existing Satellite-Dish Mount Be Reused for Starlink? ↗
- Ground-Pole Starlink Installations: Placement, Conduit, and Protection ↗
Reference sources
 Mounts
Flashing Mount / Roof Entry Assembly
A roof-weatherproofing component that may require a separate compatible mount.
Details & compatibility+
Identify the product
“Flashing mount” can refer to generation-specific or third-party assemblies. Check the product number, roof material, compatible mast or companion mount and supplied parts.
What it does
Flashing manages water at a roof penetration. It does not by itself prove that the terminal is structurally supported or aligned. Confirm both the structural attachment and waterproofing design.
Before installation
Have the roof-system requirements and companion mounting instructions available together. Do not order a legacy flashing part assuming a newer terminal snaps directly into it. Record who is responsible for roof sealing and later maintenance.
Related guides
- Starlink Roof, Wall, Fascia, and Ground-Pole Mounts Compared ↗
- Replacing a Roof When Starlink Is Already Installed ↗
Reference sources
 Mounts
Standard Ridgeline Mount
A ballasted option for compatible gable roofs without drilled mount fasteners.
Details & compatibility+
Product limits
Current guide: Standard 4/4X/Enterprise, metal or shingle gable roofs below 45°; not recommended for clay tile. Four ballast weights are listed.
Site assessment
Check the exact wind limit in the manual, roof loading, surface protection and drainage. This residential product is not a universal substitute for an engineered commercial sled.
Cable and access
Plan the separate building entry and a route that does not obstruct drainage or maintenance. Inspect ballast position and movement after work or severe weather. No roof fasteners does not mean no effect on the roof.
Related guides
- Starlink Roof, Wall, Fascia, and Ground-Pole Mounts Compared ↗
- Non-Penetrating Starlink Mounts for Commercial Roofs ↗
Reference sources
 Mounts
Ground-Pole Installation
A mounting method combining a pole, foundation, compatible adapter and protected route.
Details & compatibility+
Separate the parts
A pipe adapter is only the connection at the top. It does not include a foundation or establish a pole’s height and loading. Identify an official complete product by its exact name if one is being proposed.
Plan before digging
Compare the obstruction scan with the complete cable route, including pole height and indoor travel. Identify utilities and private lines, soil, drainage and vehicle or mower exposure.
Service access
Specify a pathway sized for the actual connector and future replacement. Conduit can collect water; plan suitable materials and entry protection. Have the foundation and above-ground assembly designed for the site rather than copying a universal depth.
Related guides
- Ground-Pole Starlink Installations: Placement, Conduit, and Protection ↗
- Protecting Starlink Cables From Rodents, Mowers, and Landscaping ↗
Reference sources
 Mounts
Flat and Mobility Mounts
Select the mount for the exact terminal and intended vehicle or vessel use.
Details & compatibility+
Standard option
The current Standard Mobility Mount lists Standard 4, 4X and Enterprise. Follow its fastening and sealing instructions for the actual surface.
Other terminals
Mini-specific mounts and older Flat High Performance wedge assemblies are separate products. Match the terminal interface, supplied hardware and documented operating limits; they are not a universal flat-mount family.
Before travel
Check retention, cable strain relief and the complete power arrangement. Confirm service-plan and destination eligibility independently. A successful short connection while moving does not prove approval or long-term mounting suitability.
Related guides
- RV Starlink: Permanent vs. Portable Mounting ↗
- Marine Starlink Mounting and Weatherproofing ↗
- Can Starlink Be Used While an RV or Boat Is Moving? ↗
Reference sources
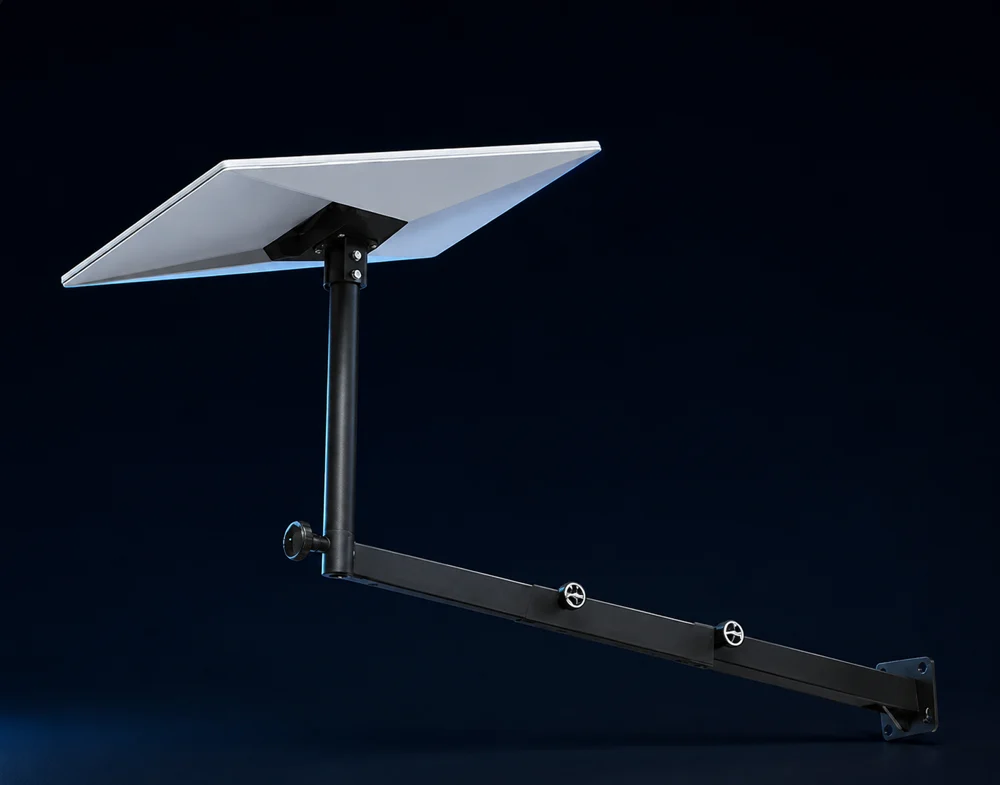 Mounts
Aftermarket Mounts
Third-party mounting options need product-specific fit and operating evidence.
Details & compatibility+
Compare by type
Under-eave brackets need structural backing and adequate sky clearance. Ladder and rack mounts need a compatible attachment shape and load path. Magnetic mounts need a suitable surface and an explicit retention/use specification.
Ask the seller
Obtain the exact terminal fit, supplied hardware, intended stationary or moving use, load/environment limits and installation manual. A photograph on a vehicle is not a rating.
Accept the installation
Check cable protection, locked engagement and access for inspection. Do not treat an unverified aftermarket accessory as Starlink-approved, and do not combine extensions without an appropriate load assessment.
Related guides
- Starlink Roof, Wall, Fascia, and Ground-Pole Mounts Compared ↗
- Under-Eave Starlink Mounting: A Clean Alternative to Roof Mounting ↗
- Can Starlink Be Used While an RV or Boat Is Moving? ↗
Reference sources
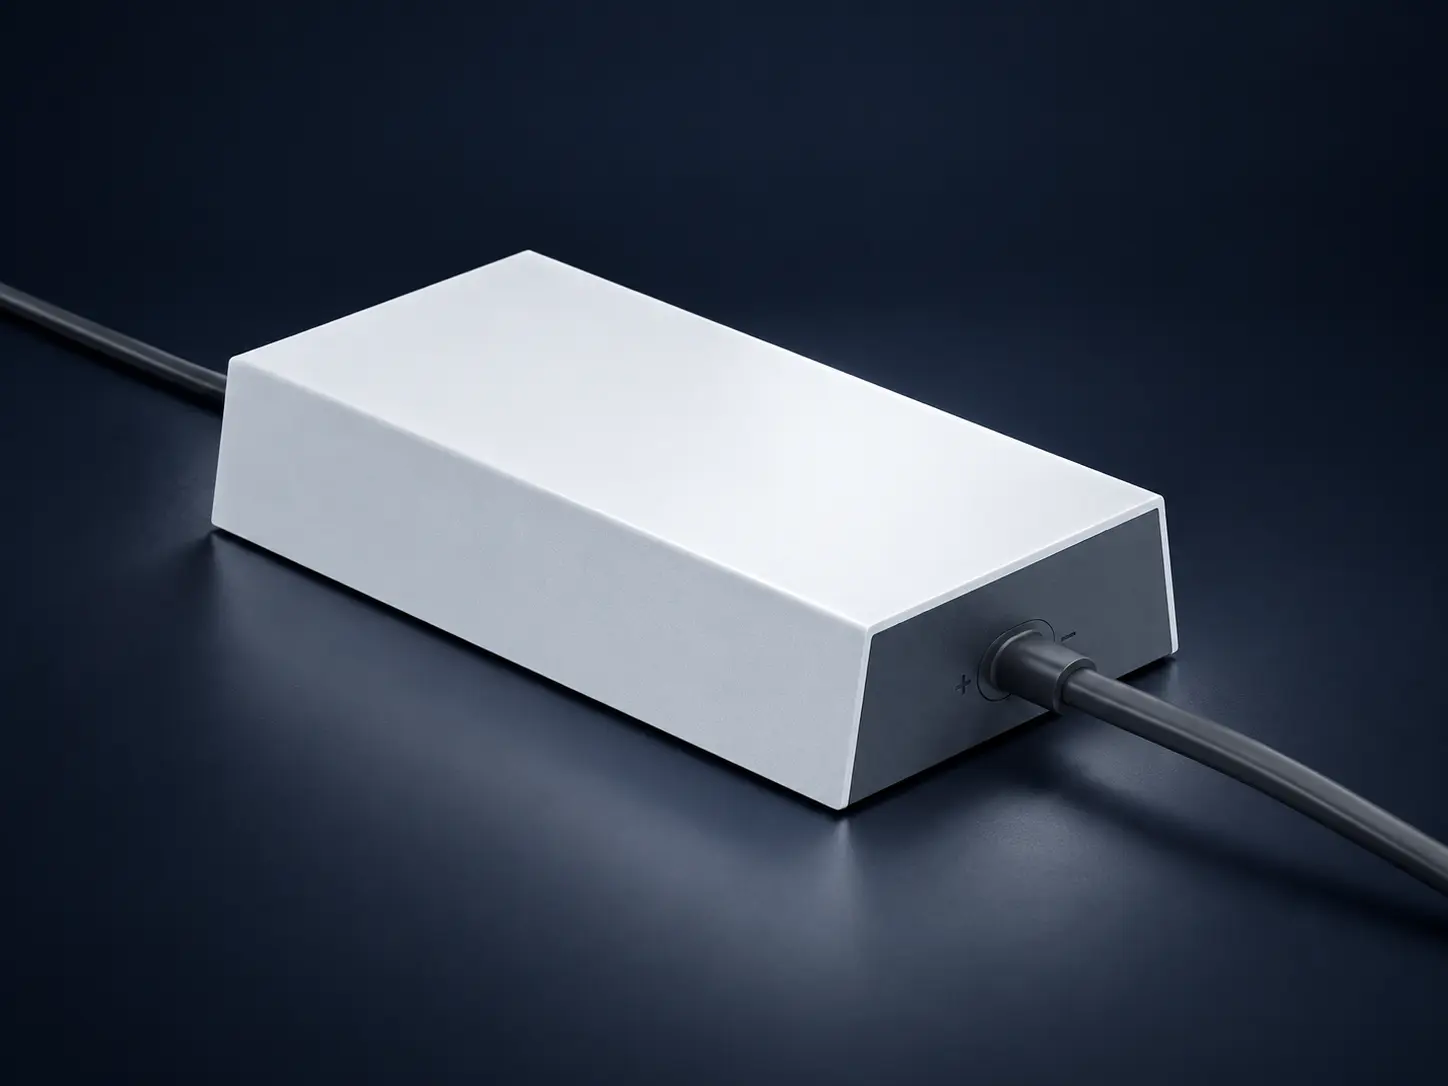 Cables
Standard 4 / 4X Terminal Cable
A model-specific powered terminal link, separate from ordinary home LAN cabling.
Details & compatibility+
Selection
The current Standard accessory guide lists 15 m and 45 m options for Standard 4/4X. Choose using the full routed distance rather than a straight-line measurement.
Route
Measure connector clearance through openings and bends. Protect the ends while pulling and preserve access for replacement. Keep the cable away from heat, crushing and sharp edges.
Fault or damage
Disconnect power before handling terminal connections. Replace a damaged assembly with an exact match instead of splicing or adding a generic coupler. Investigate the cause of damage before routing the new cable.
Related guides
- Starlink Cable Length, Conduit, and Weather Protection ↗
- How to Identify a Failing Starlink Cable or Connector ↗
Reference sources
 Cables
Mini DC Power Cable
The Mini power lead must match both the terminal and the approved source.
Details & compatibility+
Identify the path
This cable supplies power; Mini networking can use its integrated Wi-Fi or separate Ethernet port. It is not a Standard terminal cable.
Check the source
Verify voltage, connector, polarity, capacity and approved cable arrangement. For USB-C use, follow the Mini’s specified USB-PD accessory requirements. Connector fit alone is insufficient.
Install and test
Protect the cable against pinching and movement and preserve the terminal seal. Test with the actual battery or supply through the intended operating period. Unexpected resets under load can indicate a power-path problem, not poor sky view.
Related guides
- Using Starlink With an RV Battery, Inverter, or Generator ↗
- RV Starlink: Permanent vs. Portable Mounting ↗
Reference sources
 Cables
Performance Terminal Cables — Match the Generation
Current and legacy Performance cables must be identified separately.
Details & compatibility+
Current Performance
Match the cable to the current Performance terminal and Advanced Power Supply. Its published bundle includes a 25 m terminal cable; check the current parts listing for other approved options.
Flat High Performance / Gen 2
Use that terminal’s dedicated matching cable and power equipment. Do not choose solely by the words “Performance” or a similar-looking end.
Legacy actuated Performance
Confirm the model and original part before replacement. Photograph both connectors and the supply label for support.
Route and faults
Measure the full path, protect the connector seal and disconnect power before inspection. A damaged port can mimic a cable fault; test a known-compatible replacement where available before purchasing several components.
Related guides
- Starlink Dish Generations: Circular, Actuated, and Gen 3 ↗
- Starlink Cable Length, Conduit, and Weather Protection ↗
- How to Identify a Failing Starlink Cable or Connector ↗
Reference sources
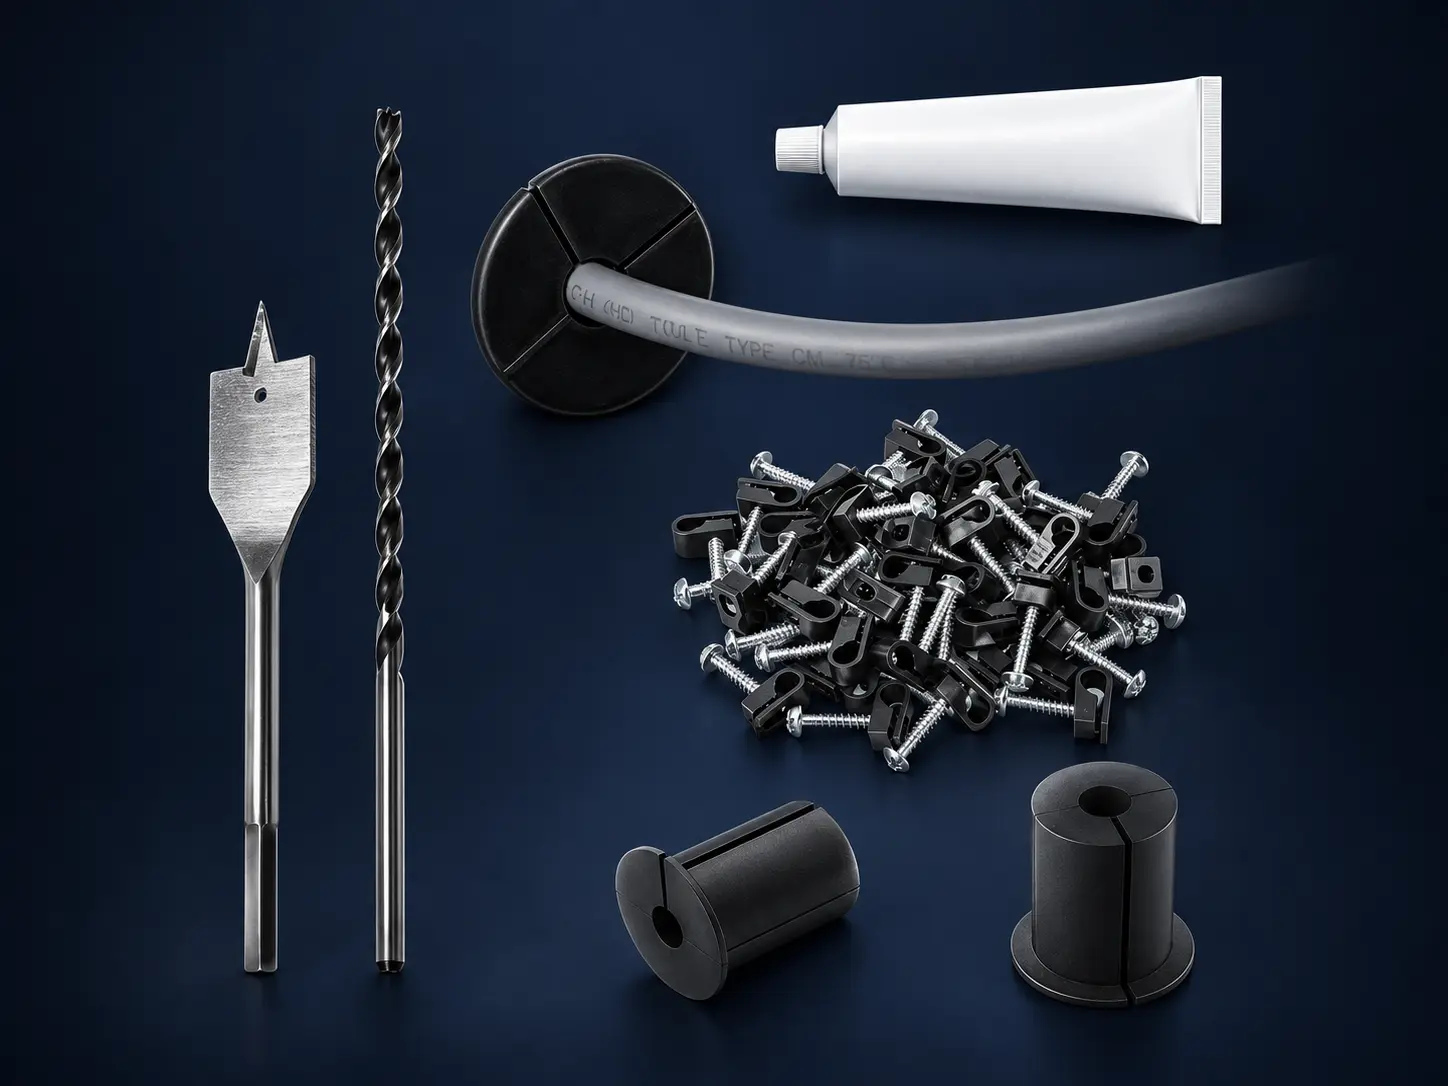 Cables
Cable Routing Kits
Entry and support components selected for the cable connector and building material.
Details & compatibility+
Inventory
Check which bushings, clips, sealing or drilling accessories the exact kit includes. A routing kit does not necessarily include the terminal cable or every material needed for the wall.
Before making an opening
Inspect both sides and identify concealed services. Match the opening and bend path to the largest connector and its protective boot, not just the jacket diameter.
Finish and inspect
Support the route without crushing it and use an entry detail appropriate to the wall or roof assembly. Keep future replacement possible. Test after routing so a damaged cable is discovered before access is closed.
Related guides
- Starlink Cable Length, Conduit, and Weather Protection ↗
- Can Starlink Share an Existing Cable or Ethernet Path? ↗
Reference sources
 Methods
Cable Protection and Conduit
A planning reference for guards, supports and serviceable cable pathways.
Details & compatibility+
Choose by exposure
Identify mowing, animal, vehicle, heat and weather risks along the actual route. Select protection that addresses those risks without creating tight bends or trapping connectors.
Moisture and access
Conduit is not guaranteed dry. Use suitable cable, fittings and entry/drainage details, and maintain access for replacement.
Before excavation
Identify utilities and private routes, photograph the planned path and agree who restores it. If a cable is damaged, disconnect safely and assess it before covering the area again.
Related guides
- Protecting Starlink Cables From Rodents, Mowers, and Landscaping ↗
- Starlink Cable Length, Conduit, and Weather Protection ↗
Reference sources
KitsStandard 4X
The current officially named Standard kit with a separate indoor router.
Details & compatibility+
Identify and inventory
Confirm Standard 4X on the official equipment record. The packing list includes the terminal, kickstand, Router 3, terminal cable and power equipment; check your regional order for the actual bundle.
Plan the installation
This is a manually positioned terminal. Use the official app for orientation. Measure the entire terminal route before choosing the compatible cable and permanent mount.
Compatibility boundary
Some Standard accessories list both 4 and 4X, but the current DC-DC supply specifically lists 4X. Do not extend that power compatibility to Standard 4 without a matching instruction.
After setup
Test near the router and in the required rooms separately. An indoor Wi-Fi problem needs placement or network work rather than another dish.
Related guides
- Starlink Mini, Standard, and Performance Dishes Compared ↗
- Choosing the Best Location for Your Starlink Dish ↗
- Starlink Cable Length, Conduit, and Weather Protection ↗
Reference sources
 Routers
Router 3
A separate Starlink Wi-Fi 6 router with two LAN Ethernet ports.
Details & compatibility+
Role and compatibility
Use as the main router or a compatible native mesh node. Current native mesh compatibility includes Gen 2, Router 3, Router Mini and Mini; excludes Gen 1 and third-party mesh pairing.
Connection
Identify WAN, LAN and power using the labeled diagram. Connect ordinary wired devices to LAN. Keep the supplied power equipment matched to the router.
Placement and verification
Start in an open central position. Test beside the router and in the weak rooms before adding nodes. Use wired backhaul where supported and practical.
Related guides
- How to Add Additional Starlink Mesh Nodes ↗
- Where Should the Starlink Router Be Placed? ↗
- Starlink Router Bypass Mode: Using Your Own Router ↗
Reference sources
 Routers
Router Mini
A compact Wi-Fi 6 router or mesh node; it is not the Mini satellite kit.
Details & compatibility+
Identify
This device provides local networking and needs an upstream internet connection. It does not receive satellite service by itself. Its documented ports are one WAN and one LAN.
Pair and connect
Use the native Starlink compatibility list in the router instructions. Wired backhaul is useful; a connection to an outdoor Mini requires its appropriate sealed Ethernet cable.
Test placement
Pair near the main router first, then move to a position with a good upstream link. A visible Wi-Fi name at a remote node does not prove the node’s backhaul is healthy.
Related guides
Reference sources
 Routers
Gen 2 Router
The router commonly supplied with Standard Actuated equipment.
Details & compatibility+
Identify
Read the label and identify its matching terminal cable and power arrangement. It has no ordinary built-in LAN socket for a direct computer connection.
Ethernet and mesh
Use the compatible Starlink Ethernet Adapter for a wired handoff. Current native Starlink routers can support compatible Gen 2 mesh arrangements; use the exact pairing instructions.
Recovery
Its reset procedure differs from Router 3. Avoid repeated rapid power cycling during ordinary troubleshooting, and keep the model-specific reset instructions available before clearing settings.
Related guides
- Starlink Router Bypass Mode: Using Your Own Router ↗
- How to Add Additional Starlink Mesh Nodes ↗
- How to Reboot or Factory Reset a Starlink Router ↗
Reference sources
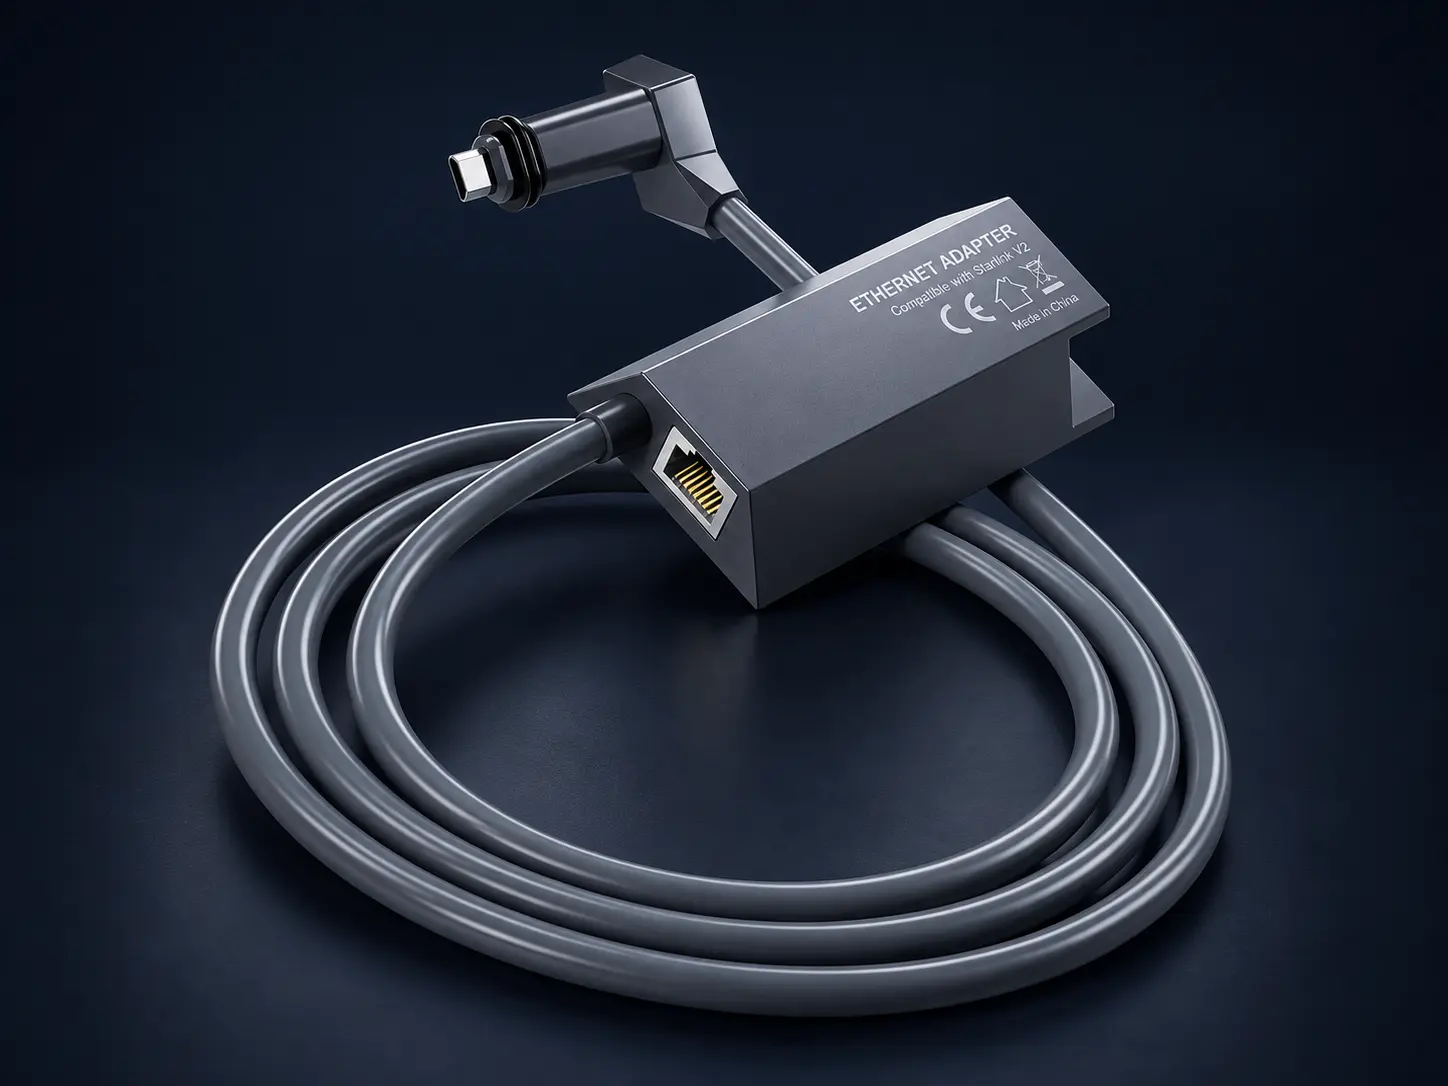 Networking
Starlink Ethernet Adapter — Gen 2
Provides an ordinary Ethernet handoff from the matching Gen 2 router arrangement.
Details & compatibility+
Where it belongs
Use the accessory listed for the Gen 2/Standard Actuated cable and router arrangement. It is not a universal USB adapter and is not required for Router 3’s existing LAN ports.
Installation
Disconnect power and follow the adapter diagram to insert it into the correct terminal/router path. Reconnect the matching cables without forcing them, then restore power.
Next connection
Use its Ethernet handoff for a wired device, switch or third-party router WAN. Choose router versus access-point mode deliberately; the adapter itself does not configure a guest network or bypass mode.
Related guides
Reference sources
 Networking
Ethernet LAN Cables
Patch cables for the home network after the supported Starlink handoff.
Details & compatibility+
Select
Match cable category and installed length to the required port rate. Cat5e is a common gigabit choice; buying a higher category does not upgrade a slow port.
Boundary
Ordinary LAN cable is not automatically a replacement for a powered Starlink terminal cable. Outdoor Mini Ethernet also needs the correct sealing arrangement.
Test
Check negotiated port speed and compare a short known-good cable before replacing an installed run. For detached buildings, assess fiber or a bridge as part of a complete link design.
Related guides
- Cat5, Cat5e, and Cat6 Ethernet Cable Differences ↗
- Wired Ethernet vs. Wi-Fi for Starlink ↗
- How to Extend Starlink Wi-Fi to a Garage, Barn, or Workshop ↗
Reference sources
 Networking
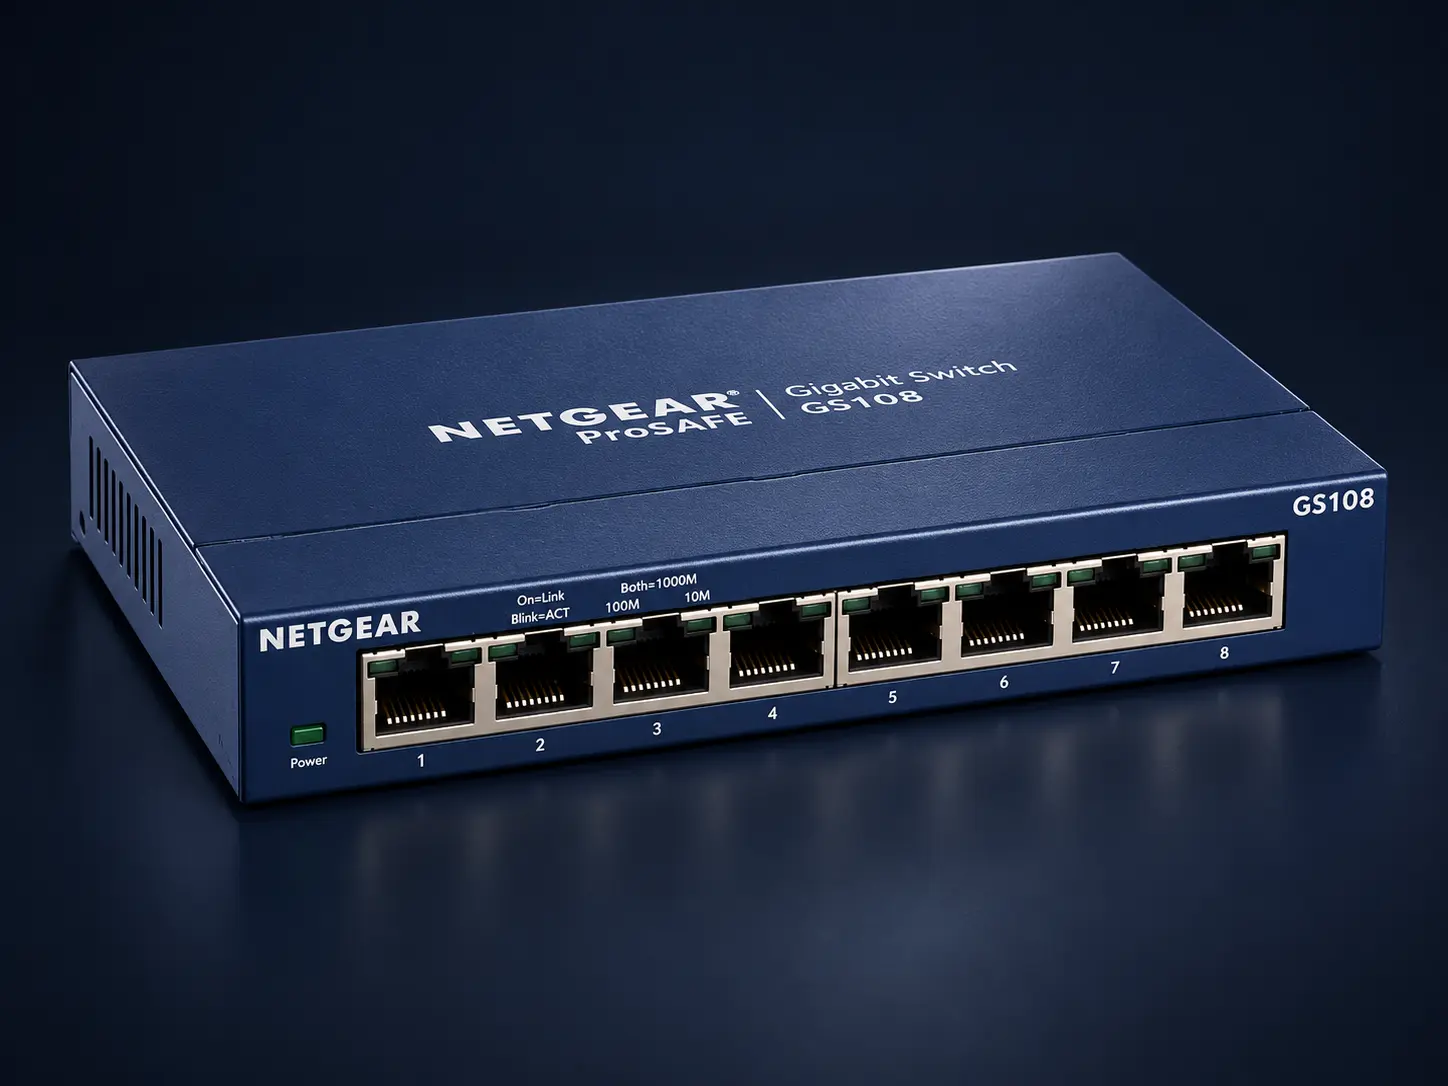
Ethernet Switch
Adds LAN connection points behind the router.
Details & compatibility+
Role
Connect one switch port to router LAN and other ports to wired devices or access points. A switch alone does not replace the router needed at an internet handoff.
Select
Count required ports and uplink speed. If powering access points or cameras, match the exact PoE standard and total power budget; not all switches provide power.
Verify
Test one device first, then the full load. Label uplinks and avoid accidental network loops. A managed switch requires a documented configuration when VLANs or guest separation are involved.
Related guides
- Wired Ethernet vs. Wi-Fi for Starlink ↗
- How to Extend Starlink Wi-Fi to a Garage, Barn, or Workshop ↗
- Starlink for Security Cameras and Smart-Home Equipment ↗
Reference sources
 Networking
Wi-Fi Access Point
Provides Wi-Fi from an existing wired local network.
Details & compatibility+
Role
Useful at the far end of a building link or where Ethernet can reach a weak room. It needs network backhaul and an appropriate power source.
Select and configure
Check indoor/outdoor suitability, power method and supported network features. Use the intended access-point mode so another router is not added accidentally.
Acceptance
Test the wired handoff first, then Wi-Fi at the actual work areas. Verify guest isolation in this mode if you need it; the feature can differ from router mode.
Related guides
- How to Extend Starlink Wi-Fi to a Garage, Barn, or Workshop ↗
- How to Create a Guest Wi-Fi Network for Visitors or Customers ↗
- Where Should the Starlink Router Be Placed? ↗
Reference sources
 Networking
Point-to-Point Bridge Pair
Two matched radios connect buildings with a suitable clear radio path.
Details & compatibility+
Inventory
Plan a radio at each end, compatible power equipment, mounting and Ethernet connections. Ordinary phone Wi-Fi in the remote building usually needs a separate access point.
Site
Check line of sight, the wider radio path, movement of trees and the manufacturers’ distance and mounting instructions. Do not assume seeing the other roof guarantees a reliable link.
Test
Align and configure the pair, test the remote wired handoff, then add indoor coverage. Record access settings securely and test recovery after an ordinary power interruption.
Related guides
- How Point-to-Point Wi-Fi Extends Internet to Other Buildings ↗
- How to Extend Starlink Wi-Fi to a Garage, Barn, or Workshop ↗
Reference sources
 Mounts
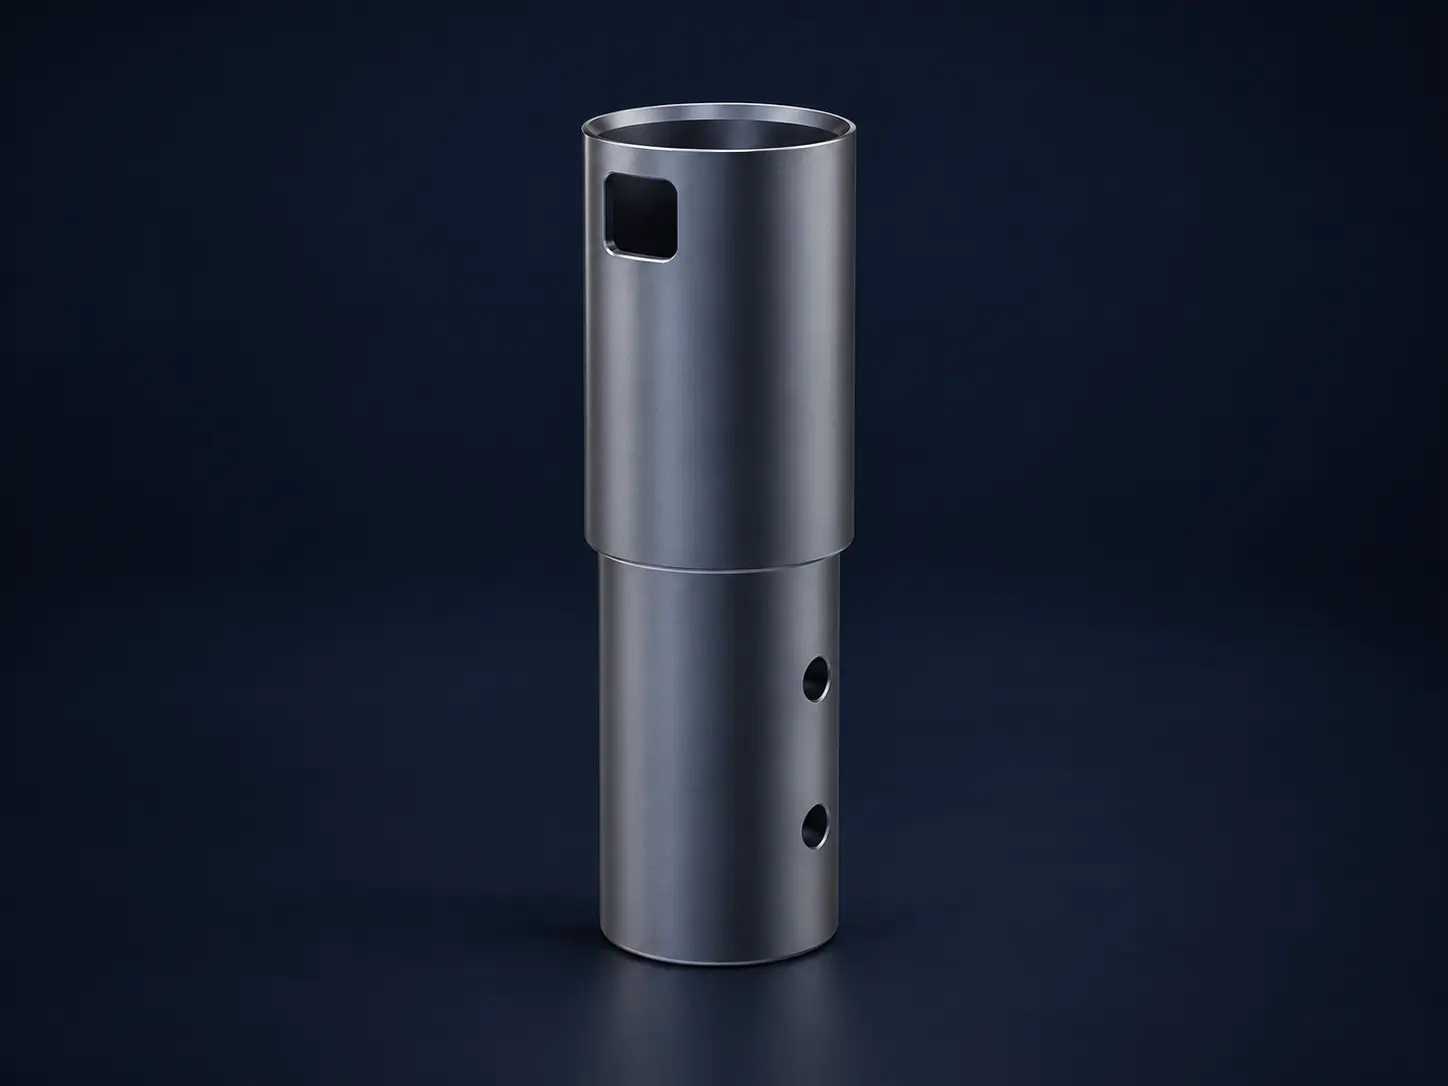
Standard-to-Actuated Mount Adapter
Allows listed older actuated mounts to support the corresponding newer Standard arrangement.
Details & compatibility+
Use
Primarily for reusing a sound existing listed actuated mount. It is not a reason to buy an old mount for a new installation.
Compatibility
Check the exact adapter instructions and original mount model. Listed older styles include wall, pivot, ground-pole and ridgeline mounts; similar third-party parts are not automatically covered.
Before reuse
Inspect the existing structure and sky view, then follow the adapter’s locking and mast instructions. The new terminal still needs its own compatible cable and power arrangement.
Related guides
- Can an Existing Satellite-Dish Mount Be Reused for Starlink? ↗
- Starlink Roof, Wall, Fascia, and Ground-Pole Mounts Compared ↗
Reference sources
 Mounts
Router 3 Mount
A model-specific bracket to secure Router 3 to a suitable surface.
Details & compatibility+
Fit
Match the bracket to Router 3, not Router Mini or a terminal. Check included screws and anchors against the actual wall material.
Placement
Prove coverage before fixing the position. Keep ventilation, power access and cable retention clear; a wall bracket does not make an indoor arrangement suitable for every outdoor location.
Handover
Confirm the router is fully retained without pinched leads. Test nearby and remote devices after moving it and retain access to ports and the reset control.
Related guides
Reference sources
![Starlink Power Supplies and DC Options]() Power
PowerStarlink Power Supplies and DC Options
Identify the exact terminal and supply before changing its power source.
Details & compatibility+
Compatibility
Treat each terminal/supply pairing as a distinct system. The current Standard DC-DC accessory lists 4X; do not infer Standard 4 support. Current Performance uses its Advanced Power Supply.
Mini and batteries
Use the approved Mini power path and required USB-PD capability when applicable. Verify voltage, capacity, connector and cable together rather than matching only a plug.
Plan and verify
Measure the complete load, including networking and conversion losses, and test the intended operating period. Permanent DC wiring needs the appropriate circuit design and protection for the vehicle, vessel or building.
Related guides
- Using Starlink With an RV Battery, Inverter, or Generator ↗
- Starlink for Remote Cabins and Off-Grid Properties ↗
Reference sources
![UPS / Battery Backup]() Power
PowerUPS / Battery Backup
Keeps selected network equipment powered for a measured period.
Details & compatibility+
Inventory
Include terminal power equipment, router, switches and access points needed for the intended connection. A battery on the router alone cannot power the rest of the link.
Sizing
Measure watts and use the UPS manufacturer’s runtime curve at that load. VA and battery marketing capacity alone do not establish usable runtime.
Test
Simulate the planned power interruption safely and verify application recovery. Record runtime, battery condition and who responds when it is exhausted. A UPS does not provide a second internet path.
Related guides
- Starlink as Backup Internet for a Business ↗
- Using Starlink With an RV Battery, Inverter, or Generator ↗
Reference sources
No matching equipment.
Try a shorter phrase or another category.